Showing posts with label hoop. Show all posts

Friday, October 25, 2013

{Happy Scrappy Halloween Hoop}

Hey there! We have a few more days to make cute Halloween stuff so lets raid the scraps and get crafty! Today I'm sharing a fun tutorial on how to make this fun little hoop art.

This project was made in partnership with JoAnn Fabrics, Creativity Made Simple and the #spookyspaces challenge. 

So cute right?! Let's talk about how I made it.

Materials:
8 or 9" Embroidery Hoop
Patchwork piece made about 2-3" bigger than your hoop
General sewing supplies
Applique supplies
ribbon
glue gun
any embellishments you'd like to add
Here is my patchwork piece. I raided my scrap bucket for all the cute black and orange pieces and sewed them together on my machine. You can piece the fabric together however you want. If you have a favorite quilt block pattern, that would be fun too! To get the pumpkin shape, I used a cookie cutter. For the lettering, I used a stamp set and ink pad and just pressed the inked stamp right onto the fabric then cut around it. It helps to use light colored fabric so the lettering shows well. I appliquéd everything to the patchwork with Heat N Bond. Then I just stitched everything down on my machine.
I stitched the appliqué down close to the edge of the design. I like the messy stitchy look. I achieve this by going around each shape twice and kind of free handing it. Almost like drawing. It's fun :) If you like a cleaner look, use the finish stitch on your machine. A zig zag is fun too. Alright, onto the hoop!
 Now you are going to cover your hoop in ribbon! Fire up that trusty glue gun.
 Glue, wrap. Glue, wrap.
 Now that you're done with the patchwork and the hoop, you can assemble your masterpiece. Make sure it's centered. Since your patchwork piece is a few inches bigger than your hoop, it's time to trim.
Trim the edge down to about a 1/2" and glue down the edge with your glue gun.

For a little finishing touch, I added a little crocheted bow.

That's it! Pretty easy peesy. Great fast project! I hope you enjoy making one and if you do, tag me on Instagram so I can see it!

All the materials for this project can be found at JoAnn's! And guess what? Since you're so awesome, I'm giving you a coupon to use!

Click HERE for your 50% off coupon! Have a happy scrappy crafty weekend!


Elizabeth
Pin It

Monday, September 23, 2013

{Crochet Embroidery Hoop TUTORIAL}

Hi friends! We're kicking off a week full of crochet happiness with a fun tutorial!


I recently took place in an embroidery hoop exchange to help raise funds for my sweet friend Emmy's adoption. I had so much fun making my hoop! I'll show you the finished hoop (and another one I just finished) at the end of this post :)

In an effort to be creative and different, I decided I wanted to crochet around the rim of the hoop! Having no clue how to do this, off to the interwebs I went. I found nothing. Sad day. So I had to wing it...my specialty! I posted a sneak peek of what I was up to on Instagram and the people went nuts so I new a tutorial was soon to follow. Well folks...here it is!

 You'll need:
A hoop. Any size. This is a 5".
Cotton yarn. I used "I Love This Cotton" from Hobby Lobby. Best. Yarn. Ever.
A size H 5mm crochet hook
scrissors
yarn needle
 Start by separating your hoop. You are only crocheting around the outer hoop. I like to keep the screw in the hoop while I'm working. It just feels more stable to me that way. I don't want things flopping about. You will kind of have to shimmy your hook around the screw to start, but it's not that bad I promise. Now you will attach your yarn to your hook with a slip knot.
 Attach your yarn to your hoop with a slip stitch.
 Now comes the fun part! Row one is just single crochets all around the hoop. In a perfect world this would be a video tutorial, but I'm just not that techy yet. So here is the step by step...pretend you are working a magic circle, but instead of the circle being yarn, it's an embroidery hoop.
  1. Instert the hook into the hoop.
  2. Pull up a loop of yarn.
  3. Yarn over.
  4. Pull through loops on hook.
See? Single Crochet. Easy right? Keep doing that all the way around.
 Yay we're almost done with row one!
 ...annnnnnd done. I did take the screw out as I got closer just to make sure my stitches covered the hoop completely.
 Ok, row two! Chain one. Turn.
 Now you are going to be working a simple scallop all around the hoop. The pattern is as follows...*skip stitch, 5 double crochet in next stitch, skip stitch, single crochet in next stitch. Follow pattern from * all the way around. Now is a good time to reinsert the screw to stabilize the hoop.
 Lookin' good! Keep scalloping.
Great job! Now take the screw out again so you can finish your last scallop. I've gotten lucky every single time I've done this and had exactly enough single crochets in row one to finish out the scallops in row two perfectly, but if you're coming to the end and it's not working out, just skip and extra stitch or shimmy in an extra scallop and smooth it out on the hoop. No big deal.
Now just fasten off, weave in the ends and you are ready to fill your hoop! Here are the finished ones I've made!


Aren't they adorable?!? I hope you enjoyed this tutorial. Go hoop it up my crafty friends!

***SHOP DISCOUNT***
 Take 10% off my One Skein Infinity Scarf Pattern with the code INFINITY10.


Elizabeth
Pin It

Monday, November 5, 2012

{Holiday Bake, Craft, Sew Along} & HUGE GIVEAWAY!!!

I am over at Skip to my Lou guest posting today for the Holiday Bake Craft Sew Along. 


I'm sharing the how to on this fun little hoop ornament!

 ...AND I get to treat you to a SEW Amazing giveaway as part of our crafty series.
This is one AMAZING giveaway!
We are giving away a fabulous Prize Package worth more than $700!

One lucky winner will receive...
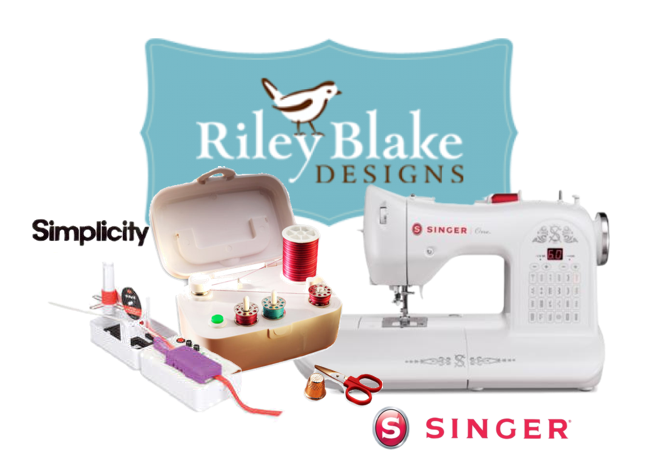
  • Singer ONE Sewing Machine this is Singer's easiest sewing machine! True to SINGER, it is easy to learn on, simple and has basic stitches for crafts. The perfect machine for stitching home made goods or something fun this holiday season!
  • Simplicity SideWinder Quickly and easily fill bobbins without having to un-thread and re-thread your sewing machine. The SideWinder transfers thread from spool to bobbin effortlessly and quickly; works with most bobbins, metal or plastic. An adjustable tension knob accommodates different thicknesses of thread! So cool!
  • Simplicity Bias Tape Maker This Simplicity Bias Tape Maker will Create customized single fold bias tape with the push of a button!
  • and so you have something beautiful to sew, $100.00 of fabric from Riley Blake!
Simply wait for RaffleCopter to load and enter there! Be sure to check out all the fabulous sewing projects shared this month for this Holiday Bake Craft Sew series going on all month long!
  

Elizabeth
Pin It
Related Posts Plugin for WordPress, Blogger...