Showing posts with label Fabric. Show all posts

Wednesday, January 9, 2013

{Gallery Wall...hoops and letters}

Hi everyone! Happy Wednesday to you! I've been doing some fun projects around the house and today I am sharing the first of several gallery wall type clusters I'm doing in our living room!


This was so fun and simple to put together! We've lived in our home for almost 10 years, so it's about time I hung stuff up on the walls, yes?


 Embroidery hoops wrapped in fabric frame some of my favorite bright cheery prints. I bought all the "O's" at Hobby Lobby and have fun plans for them with different textures and such. I'm going to add a few more things to this wall eventually, but for now I think it's a good start!

I can't stop looking at it! It's just so fun and homey. Really cozies things up in here!

Have a happy day friends!


Elizabeth
Pin It

Monday, November 5, 2012

{Holiday Bake, Craft, Sew Along} & HUGE GIVEAWAY!!!

I am over at Skip to my Lou guest posting today for the Holiday Bake Craft Sew Along


I'm sharing the how to on this fun little hoop ornament!

 ...AND I get to treat you to a SEW Amazing giveaway as part of our crafty series.
This is one AMAZING giveaway!
We are giving away a fabulous Prize Package worth more than $700!

One lucky winner will receive...
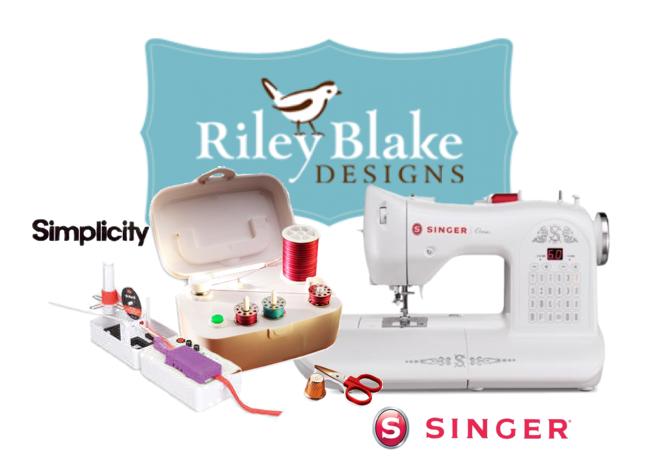
  • Singer ONE Sewing Machine this is Singer's easiest sewing machine! True to SINGER, it is easy to learn on, simple and has basic stitches for crafts. The perfect machine for stitching home made goods or something fun this holiday season!
  • Simplicity SideWinder Quickly and easily fill bobbins without having to un-thread and re-thread your sewing machine. The SideWinder transfers thread from spool to bobbin effortlessly and quickly; works with most bobbins, metal or plastic. An adjustable tension knob accommodates different thicknesses of thread! So cool!
  • Simplicity Bias Tape Maker This Simplicity Bias Tape Maker will Create customized single fold bias tape with the push of a button!
  • and so you have something beautiful to sew, $100.00 of fabric from Riley Blake!
Simply wait for RaffleCopter to load and enter there! Be sure to check out all the fabulous sewing projects shared this month for this Holiday Bake Craft Sew series going on all month long!
  

Elizabeth
Pin It

Thursday, September 20, 2012

{DIY: Fabric iPhone Case}

Hi friends! I'm sharing a fun little tutorial with you today! 

 I'm sort of obsessed with cute iPhone cases, but they are REALLY expensive so I'm showing you an awesome and inexpensive way to dress up your phone! Here we go!
 Supplies you need:
  • A clear case. I found mine at Nordstrom Rack and it was $8. It's plastic, not silicon or rubberized so you shouldn't have a problem with a case like this yellowing. If you don't have a Rack near you, try Marshall's, Ross, or TJ Maxx and I bet you'll find on on the cheap!
  • Fabric scraps
  • card stock
  • pencil
  • glue stick
  • tiny scissors/exacto blade
  • fray check is optional
 First you are going to trace your case onto card stock. Trace as many times as you want. I made 3. I like variety :) Trace the little hole for the camera too.
 Next, cut the shapes out. You'll cut out the tiny camera hole too. That part is a beast, sorry! I found it easiest to cut out the case shape then score the center of the little hole with the blade for my scissors to poke through, then carefully cut it out.

Once you have the inserts cut out, you will want to put it into the case to make sure it fits and to make sure the hole is in exactly the right place. You may have to fiddle with it and give it a little trim until it fits in the case properly.
 Now you will apply your glue to the card stock. Make sure you apply the glue to the correct side and that the little hole you very diligently cut out is now in the top left corner.
 Place your insert glue side down to the WRONG SIDE of your pretty fabric. I let the glue dry for a few minutes the cut around the edge. Then I cute out the little hole. Again, that part is a beast, but you'll get through it.
 This next part is optional, but for a neat finish, apply fray check to the edges making sure to get the edges of the camera hole as well. After it dries, snip away any loose threads.
 That's it! So pretty right!?! I think this one is my favorite!

Ta da! 4 brand new iPhone cases for $8 plus a few things you probalby already have lying around. I just saved you like $100 AT LEAST!

Happy crafting!

Elizabeth
Pin It

Wednesday, September 5, 2012

{Custom Order: Messenger Bag}

I don't take very many custom orders this time of year typically because I'm too busy sewing for the shop and the upcoming boutique season, but I made some time to make this FUN bag for a girl in our church who just started her senior year of high school!


Messneger style bags are my favorite bags to carry! This bag is being used to carry books and dance clothes so I made it extra large with a magnetic snap closure.

 This was the first time I had ever made an adjustable strap. I had finished the bag, but the strap was WAY too long. I was stressing but instagram friends came to the rescue and told me I could just add a slide and with some minor alterations to the already finished strap, it worked perfectly!
 This bicycle print is just too cute for words! I have a little bit left so I think I'll make a few wallets out of it and list them in the shop!
I added a divided pocket for her phone and a pen too.

School has started back up and fall is coming I can just feel it! I need to go pick up a new pumpkin spice candle!

Have a happy day friends!


Elizabeth
Pin It

Thursday, July 19, 2012

{travel tips for special needs families}

Hi there! A few weeks back we went on a little family getaway to Las Vegas. We had tons of fun! Swam a lot, ate a lot...so nice to get out of town with my boys for a few days!

For those of you that are like us and have a child with autism {or any special need}, you know occasionally they can get distracted and become as I like to call "a flight risk". Meaning that at any given moment they could be right next to you and then see something interesting and bolt with no notice at all {toddlers and preschoolers do this too :P}. 

Anyhow, this factor lead me to do a little prep work before we headed out of town...

 ID Cuff & Bag Handle

The hand strap is from an AWESOME tutorial by Make It & Love It. My son is almost 8 so he's a little "too cool" to hold my hand, but because he's a bolter when something catches his attention, I needed to do something! This worked out great. We didn't have to use it too much either. Just in large crowds. The handle gave him just enough freedom but kept him right with us. Peace of mind for momma :)
 The handle has a loop at each end. One to hook onto your bag...
 and one for the child to hold onto. We'll be using this at Disneyland during the crowded season too.
 My next project was this ID cuff. I saw this idea online, but didn't have time to order {super slacker who waited until the last minute} so I kind of just made it up as I went...
 Fun boy print, velcro closure.
 Inside is lined with flannel and has a label with his ID info on fabric paper that I sewed onto the flannel. Pretty easy peesy and he wore it with no complaints...SCORE! If we weren't in the pool or the room, he had the cuff on. Proud to say, we didn't lose him once!

I'm so glad that I took the time to make these these things before our trip. When you have a little on with special needs, travel is hard and taking extra precautions for safety can be necessary.

Do you have a child with special needs? What are some things that you do to prepare for traveling?

Wishing you safe and happy vacations this summer!

Don't forget to enter the Christmas in July fabric giveaway! Enter HERE.


Elizabeth
Pin It

Thursday, March 22, 2012

{let's make your keys cute}

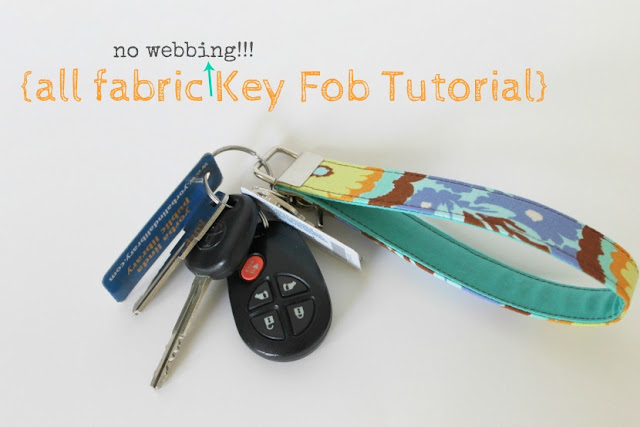
I have a fun and EASY tutorial for you today for an {all fabric} Key Fob! 


Key fobs are FABULOUS. Hands free is the way to be! Yes, I know that there are lots of key fob tutorials but I was not able to find one that I liked that used only fabric NO WEBBING so I made my own and I'm sharing with you because I like you a lot and I want you to have cute things. You're welcome.

Alright here we go!

First lets gather our supplies.

You're going to need:
 1. two coordinating fabrics. Cut 1 12"x2" piece of each one.
2. key fob hardware. I used 1" key fob hardware that I purchased HERE.
3. Peltex. You can find it at the fabric store with all the interfacing. It's the one that's SUPER STIFF like cardboard. You are going to cut your Peltex just a hair shy of 1 inch wide. The length is 12".
4. various other supplies: coordinating thread, mat, rotary cutter, hem gauge, fray check, pliers, kitchen towel
5. optional lobster clasp {so you can clip in onto your bag/jeans when you're out and about}

 Now that your strips are cut press them nicely and put them right sides together. You can pin if you want to. I'm not a pinner. Slows me down!
 Sew RST using a 1/4 seam allowance.
 Press your seam open.
Press on the front side too.
 Now take your hem gauge and press the edges under and 5/8" {that says 1/2", but ignore it and do 5/8}. Do this for both long edges.
 Fold in half and press well. Lots of steam!
 Press it on the front side too.
 Now you're going to shimmy your strip of Peltex into the seam allowance of the "outer" side.
It will look like this when you have it in there.
 Press it well from both sides making sure the edges are matching up nicely.
 Now you are going to top-stitch down both sides. I think a 1/8" top-stitch looks nice.
 Time to trim up the edges to make them nice and neat.
 Grab your fray check and apply to all the raw edges.
While the fray check dries, go find the pliers and maybe eat a piece of chocolate.
 Fold your fob in half right side out matching up the raw edges.
 Place your hardware over the raw edges.
 Wrap your fob in your towel {so you don't scratch the metal} and squeeze hardware into place. Make sure everything is still lined up perfectly after you put the towel over. Squeeze the middle first, then the sides. That's what works best for me. Attach your key ring and optional lobster clasp and your done!
 Thanks for stopping by! Now go make your keys cute!


Elizabeth
Pin It
Related Posts Plugin for WordPress, Blogger...