Monday, October 21, 2013

{Crochet Rippled Mug Rug Tutorial}

Hey there! I have a fun little project to share with you today! Over the weekend, I taught myself how to do the ripple crochet stitch. I can safely say I'm already addicted and will start on my first blanket soon!

image via my Instagram @sewchatty

I taught myself using the AWESOME tutorial from Attic 24. If you are a crocheter, you need to know about this blog. So much inspiration there!

Anyhow, she teaches you how to do a sample that's two rows. I got in the groove and wanted to keep going. Ripping out the stitches and starting a real project seemed sad sooooooo...I turned my practice sample into a ripply mug rug!

 I kept repeating the pattern, changing colors as I went. I ended up with this fun little rainbow that I just love! It's 5 stripes total (10 rows). What a sweet little gift this would be with a favorite tea and cookie.

Here's a second pinnable image for you :)

So get to it! Teach yourself how to do the ripple stitch and turn your practice piece into a perfect little mug rug! Happy stitching friends!

Elizabeth
Pin It

Friday, September 27, 2013

{Rainbow Crochet Mini Heart Garland}

Hi there! Welcome to the last post of crochet week! It's been so fun sharing ideas with you! Finishing off our week together is another super simple tutorial. This time for a little heart garland!

 So cute right?!?! Perfect to add a little touch to your craft room or kitchen or wherever you need some hearts and rainbows. Which is everywhere if you ask me. 

Let's get to it! Here's what you need:
Rainbow yarn. I used "I love this Cotton" by Hobby Lobby.
Size H 5mm crochet hook.
Scissors
Yarn needle
string for stringing the garland

Directions:
You are going to make 12 mini rainbow hearts using this pattern:
Magic circle. Chain 2.
In the circle...3 triple crochet, 4 double crochet, 3 triple crochet
Pull yarn to mostly close the circle, leaving a small hole. Chain 2. Slip stitch into hole to finish heart. Pull yarn to close it up tight. Fasten off. Weave in ends. Repeat for 12 hearts.

Now that you have your 12 super cute little rainbow hearts, it's time to string them up. Cut a piece of string four feet long. String up your hearts weaving in and out of the tops of the hearts. Try to space them evenly on the string and leave about 6 inches on each side for hanging.


Make sure to check out the other projects from Crochet Week! 


Have a happy crafty weekend my friends! See you next week with some fun Halloween ideas!


Elizabeth
Pin It

Thursday, September 26, 2013

{Mug Sweater TUTORIAL}

Happy Thursday to you! I hope you have enjoyed Crochet Week so far! If you're stopping by for the first time today, be sure to scroll through the other posts!

Today I'm releasing my Mug Sweater pattern as a FREE tutorial woohoo!!


Click HERE to download the full pattern! Or you can reference the embedded portion below. Enjoy!


Don't forget that this week only you can take 10% off my One Skein Infinity Scarf Pattern with the code INFINITY10.

Happy Stitching!

Elizabeth
Pin It

Wednesday, September 25, 2013

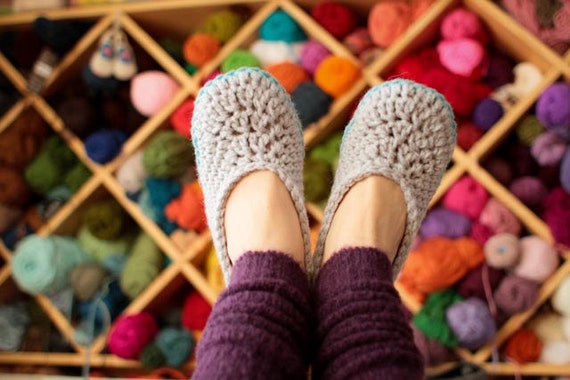
{Crochet roundup: Top 5 projects to make this fall}


Welcome back to crochet week! Today is a roundup of the top 5 projects I can't wait to make this fall! Let's get to it!


I'm so looking forward to working on these projects in the coming weeks! I'll be sure to post my progress. For all sorts of crochet inspiration, follow my Crochet Board on Pinterest!

Are you just learning to crochet? Check out this roundup of fun projects for beginners!


***SHOP DISCOUNT***
Take 10% off my One Skein Infinity Scarf Pattern with the code INFINITY10.


Elizabeth
Pin It
Related Posts Plugin for WordPress, Blogger...