Showing posts with label patchwork. Show all posts

Friday, October 25, 2013

{Happy Scrappy Halloween Hoop}

Hey there! We have a few more days to make cute Halloween stuff so lets raid the scraps and get crafty! Today I'm sharing a fun tutorial on how to make this fun little hoop art.

This project was made in partnership with JoAnn Fabrics, Creativity Made Simple and the #spookyspaces challenge. 

So cute right?! Let's talk about how I made it.

Materials:
8 or 9" Embroidery Hoop
Patchwork piece made about 2-3" bigger than your hoop
General sewing supplies
Applique supplies
ribbon
glue gun
any embellishments you'd like to add
Here is my patchwork piece. I raided my scrap bucket for all the cute black and orange pieces and sewed them together on my machine. You can piece the fabric together however you want. If you have a favorite quilt block pattern, that would be fun too! To get the pumpkin shape, I used a cookie cutter. For the lettering, I used a stamp set and ink pad and just pressed the inked stamp right onto the fabric then cut around it. It helps to use light colored fabric so the lettering shows well. I appliquéd everything to the patchwork with Heat N Bond. Then I just stitched everything down on my machine.
I stitched the appliqué down close to the edge of the design. I like the messy stitchy look. I achieve this by going around each shape twice and kind of free handing it. Almost like drawing. It's fun :) If you like a cleaner look, use the finish stitch on your machine. A zig zag is fun too. Alright, onto the hoop!
 Now you are going to cover your hoop in ribbon! Fire up that trusty glue gun.
 Glue, wrap. Glue, wrap.
 Now that you're done with the patchwork and the hoop, you can assemble your masterpiece. Make sure it's centered. Since your patchwork piece is a few inches bigger than your hoop, it's time to trim.
Trim the edge down to about a 1/2" and glue down the edge with your glue gun.

For a little finishing touch, I added a little crocheted bow.

That's it! Pretty easy peesy. Great fast project! I hope you enjoy making one and if you do, tag me on Instagram so I can see it!

All the materials for this project can be found at JoAnn's! And guess what? Since you're so awesome, I'm giving you a coupon to use!

Click HERE for your 50% off coupon! Have a happy scrappy crafty weekend!


Elizabeth
Pin It

Wednesday, April 10, 2013

{Sewing Room Update: Quilted Throw & Pillow Covers}

Hi friends! I've been busy sprucing things up in my sewing room over the last few weeks. De-cluttering and moving stuff around is my love language. Here's my most recent project!


We recently moved the full sized bed that was in there into my sons room and downsized to a futon for the sewing room. This room also doubles as our guest room so we need to have a place for friends and family to sleep, but it's SO nice to have a cozy "couch" to sit and crochet and blog and rest...ahhh. My happy place!

First let's talk about this fun quilted throw! If you're new to quilting or wanting a first ptoject, this would be a great blanket to start with! 

 You can find the full tutorial for this quilted throw HERE. This takes a layer cake which is 10x10 squares. I bought this particular layer cakes YEARS ago and have been hoarding it for just the right project. It's Dill Blossom by Robert Kaufman. I just love the sketchy hand-drawn look. Perfect for the craft/sewing room!

The finished throw is 58x58. Perfect lap size.

 The back is a pretty aqua kona solid with one row of the leftover blocks from the front. My layer cake was short two squares so I just went through my stash to find a few prints that coordinated.

I think the button detail is my favorite feature of this blanket! I've never quilted with buttons before, but it's so cute!

All in all, I thought this was a GREAT tutorial. Easy to follow and it came together really quickly. I did do a few things differently at the end: I top-stitched around the quilt after I slip-stitched the opening closed. Because you aren't binding it, I think it needs it. Also, I just really like top-stitching. For the buttons...I grabbed an Elmer's glue stick and tacked them down first to assure they wouldn't budge when I was sewing them on. Then I sewed them down with my sewing machine. Yep, you can sew buttons with your sewing machine. There are lots of tutorials on You Tube, but basically, you cover your feed dogs, pop on your button foot, and use a zigzag stitch. Easy peesy. Then I just brought the top threads to the back with a needle and hand tied them.

Ok, onto the pillows!


I just did a simple envelope style pillow cover. The two big pillows came with the futon, but they were just dark gray and screaming for a color makeover! The smaller pillow came with the old set of bedding that we had in here. If you're looking for pillows...hit up Ross. Do not by pillow forms at the fabric store. Way cheaper to by an ugly pillow at Ross and cover it yourself. Bam. 

Constriction wise, I just went with a pretty front with a solid back. LOVE the prints for this room. They can all be found at Whole Port. They have a really fun selection of prints and awesome prices!

Stay tuned for more updates to my sewing room! Have a happy day!

Elizabeth
Pin It

Monday, November 5, 2012

{Holiday Bake, Craft, Sew Along} & HUGE GIVEAWAY!!!

I am over at Skip to my Lou guest posting today for the Holiday Bake Craft Sew Along


I'm sharing the how to on this fun little hoop ornament!

 ...AND I get to treat you to a SEW Amazing giveaway as part of our crafty series.
This is one AMAZING giveaway!
We are giving away a fabulous Prize Package worth more than $700!

One lucky winner will receive...
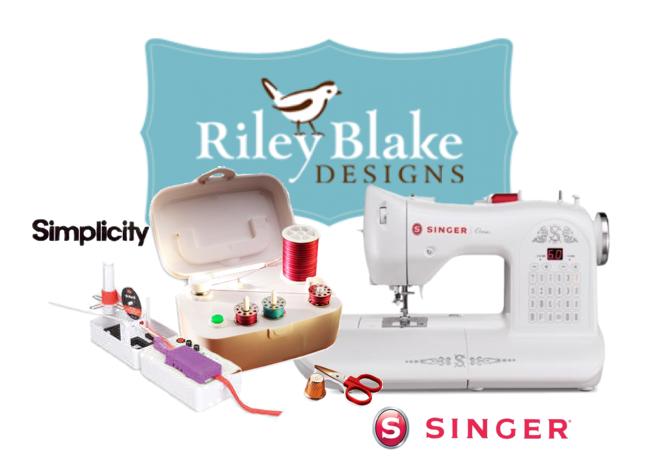
  • Singer ONE Sewing Machine this is Singer's easiest sewing machine! True to SINGER, it is easy to learn on, simple and has basic stitches for crafts. The perfect machine for stitching home made goods or something fun this holiday season!
  • Simplicity SideWinder Quickly and easily fill bobbins without having to un-thread and re-thread your sewing machine. The SideWinder transfers thread from spool to bobbin effortlessly and quickly; works with most bobbins, metal or plastic. An adjustable tension knob accommodates different thicknesses of thread! So cool!
  • Simplicity Bias Tape Maker This Simplicity Bias Tape Maker will Create customized single fold bias tape with the push of a button!
  • and so you have something beautiful to sew, $100.00 of fabric from Riley Blake!
Simply wait for RaffleCopter to load and enter there! Be sure to check out all the fabulous sewing projects shared this month for this Holiday Bake Craft Sew series going on all month long!
  

Elizabeth
Pin It

Wednesday, April 11, 2012

{hoodie refashion}

I have another fun Goodwill refashion project to share with you today!


A few weeks back, I found this hoodie at the Goodwill for $5.99. Loved the color. Loved the shape. Looked brand spankin' new. DID NOT LOVE THE BACK. You'll see why. I knew a fun project was in order!

I mean, don't get me wrong, I like Web MD as much as the next person, but I'd rather not wear it across my back.

Enter my love of all things patchwork. While the hoodie was in the wash, I sewed some fabric scraps together, top-stitched the piece to look more "quilted" and put some heat n' bond on the back. When the hoodie was all clean, I pressed the patchwork piece to the back over the Web MD disaster and top-stitched around it twice. Viola!


I left the edges raw because I like the worn frayed look, but you could finish the edges if you want to.


 Easy peesy! $6 hoodie...YESSSSSS!

And guess what??? If you're a fan of Keyka Lou sewing patterns, I have a special treat for you!

Yep, all patterns are only $5! Just click the button on my sidebar to shop!

Elizabeth
Pin It

Friday, March 23, 2012

{shop update}

Hi friends! Happy Friday! I am so ready for the weekend! It's supposed to rain hear on Sunday so I have big plans to curl up the couch with my Kindle and READ!!! 

There are a few new things in the shop{s}!


This is the LAST Belted Tote in this color way! It can be yours HERE.

The yellow and gray color way sold out at my show last weekend, but good news for you...I have enough fabric to make TWO MORE!!! If you're interested in one, shoot me an email and I'll get you on my custom order list! {sold out, sorry friends! Stay tuned for more bag updates!}

Thank you all SO MUCH for the love on my DIY Business cards!!! 


 I was overwhelmed by the response I received to the tutorial! I love that you loved it! Do you need something cute to carry your new business cards in??? Well I can hook you up! 

Two different styles to choose from! Both have two interior pockets and both will hold your business cards, cash, debit card AND your phone!!!


 So fun. They're my favorite! I carry mine everywhere. 

Lastly, there is a new crochet item in my Etsy shop!


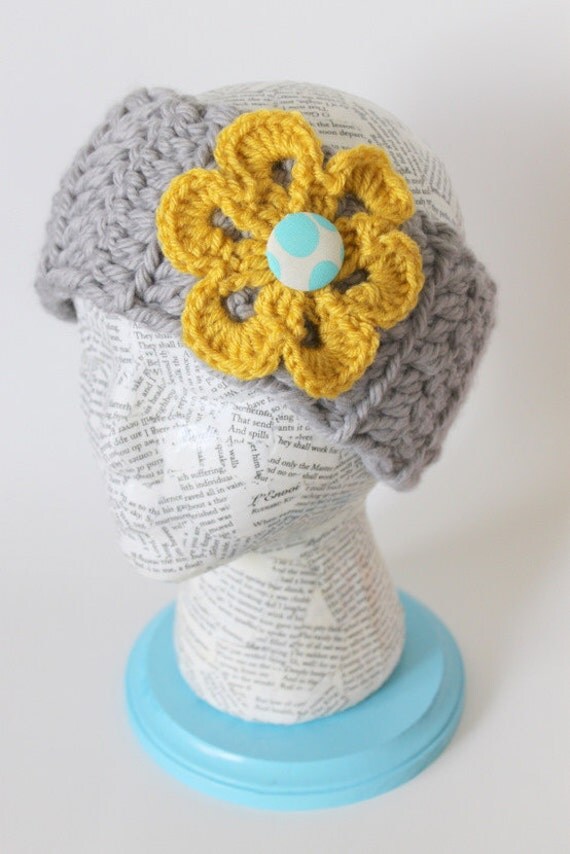
A fun chunky headband with a flower and a fabric covered button. Cozy perfection. It can be yours HERE. I am hoping to whip up a few more this weekend if I have time! 

Have a great day everyone!


Elizabeth
Pin It

Tuesday, February 28, 2012

{patchy goodness}

Hey there! I hope your week has gotten off to a happy start! A HUGE THANK YOU to all who came and linked up to Made With Love yesterday! It was Sew Chatty's largest link up to date! So fun! I hope you'll browse through all the awesome projects! It's like a Pinner's dream come true!

Don't worry! It's not too late to join the party! Come link up your projects and recipes HERE.

With the amount of sewing I do for the shop and custom orders, I end up with TONS of scraps! I hate to throw them out so I hoard them like a crazy person until my scrap bin is overflowing. It was getting out of control so I decided to sew up some large pieces of patchwork to use for some upcoming projects {probably this tote}. I love patchwork.


I went through all my scraps and organized them by color. I mixed some aquas and oranges for this piece! Working on a yellow and gray colorway as well as red and aqua! Fun times :)

Hope you have a great day! Happy crafting!

Elizabeth
Pin It

Thursday, October 6, 2011

I’m a jetsetter…or super crazy.

Hi there! I hope you all are having a lovely week! These last few days have been insanity for me!

Last Thursday I left for a Crafty Girls Weekend in Newport Beach with Amy Cornwell, Katie Peters, Jaqui Sharp, Nicole Milkie, Kristin Murphy, and Megan Reynolds. It was a blast and I promise to tell you more about it soon, but here is a pic of us lovely ladies (minus Nicole…she was the photog).

image

Got home Sunday and left Monday for a pastor’s conference in Palm Springs. It was fabulous. Such a lovely time of reconnecting and inspiring us to serve righteously in ministry.

Got home Wednesday and leave today (Thursday) for our church’s Fall Ladies Retreat in Carlsbad. Wow. Not sure how I’ll adjust back to real life next week!

Want to see some of the decorations I made for retreat???

Retreat Bunting

6 Bunting Flags

SAMSUNG

2 Hoopty Hoops

Retreat Wreath

and a super cute tiny bunting wreath. I love how everything turned out! I want to make a welcome banner too…ya know…in all my spare time! If that happens, there will be pics :)

Have a great day! I’m off to repack my suitcase for trip number 3!

Elizabeth

Related Posts Plugin for WordPress, Blogger...